Showing posts with label pinterest recipe
Let me start off by saying how much I've always disliked soups. A weird introduction, right? But it's true! I never ate soup or stew because the texture freaked me out. What's the point of eating flavored water??

There was only one type of soup I liked and that was Baked Potato Soup (because it's fattening and delicious). I realized that the reason I liked it was because it was hearty and thick. I started to wonder what other types of soups I could whip up that I would enjoy...and was also healthy enough for my mom and sister.

I've gotten into the habit of cooking dinner for my family on Sundays since I'm home alone and both my mom and sister work.

I was searching Pinterest high & low for a soup recipe that seemed suitable for November weather and finally decided on this Chicken and Dumpling recipe.  I followed it pretty closely, if not exact.

The major plus side of this recipe? It's made for the Crockpot. That's usually what I stick to on Sunday afternoons because even though the prep is a little much, I can just sit back and let the meal cook without worrying about it.

Spoiler alert: this soup was DELICIOUS and I need to make it again ASAP.

Ingredients:

  • 2 boneless, skinless chicken breasts
  • 2 Tbsp of butter
  • 2 cans of Cream of Chicken soup
  • 14.5 oz of Chicken broth
  • 4 Grands Flaky Refrigerator biscuits


Steps:
  • Put chicken in crock pot and top with butter
  • Add Cream of Chicken soup & chicken broth 
  • Cover, cook on high for 4-5 hours OR low for 8-9 hours
  • Chicken will begin to soften as it cooks, after about 3-4 hours, shred the chicken with a fork while still in the crock pot
  • Cut up the biscuits into 9 pieces, place in soup after initial cooking time
  • Cook on high for another hour
  • Serve warm and eat the deliciousness! 


It was super simple to make and we had lots of leftovers-- I need to make this again ASAP! 

What is your favorite Sunday night recipe?


On Sundays, I'm home alone all day. Both my mom and sister are at work so I usually have the most relaxing day on planet earth and I cherish my Sundays with all my heart.

Because I'm home all day with Gossip Girl on Netflix and the only real responsibility of blogging to keep me busy, I sometimes experiment with recipes. I'll make myself a fancy, aggressive breakfast and I've just started cooking dinner for my family.

Well, last week I made a kick ass Loaded Cauliflower Soup in the Crock Pot but forgot to take photos so we'll wait on a blog post on that. That's what I originally had planned for today but then I also forgot that I made dinner Monday night too.

I was off last week for Columbus Day and decided to try my hand at another recipe and this was even more delicious and easier that the soup.

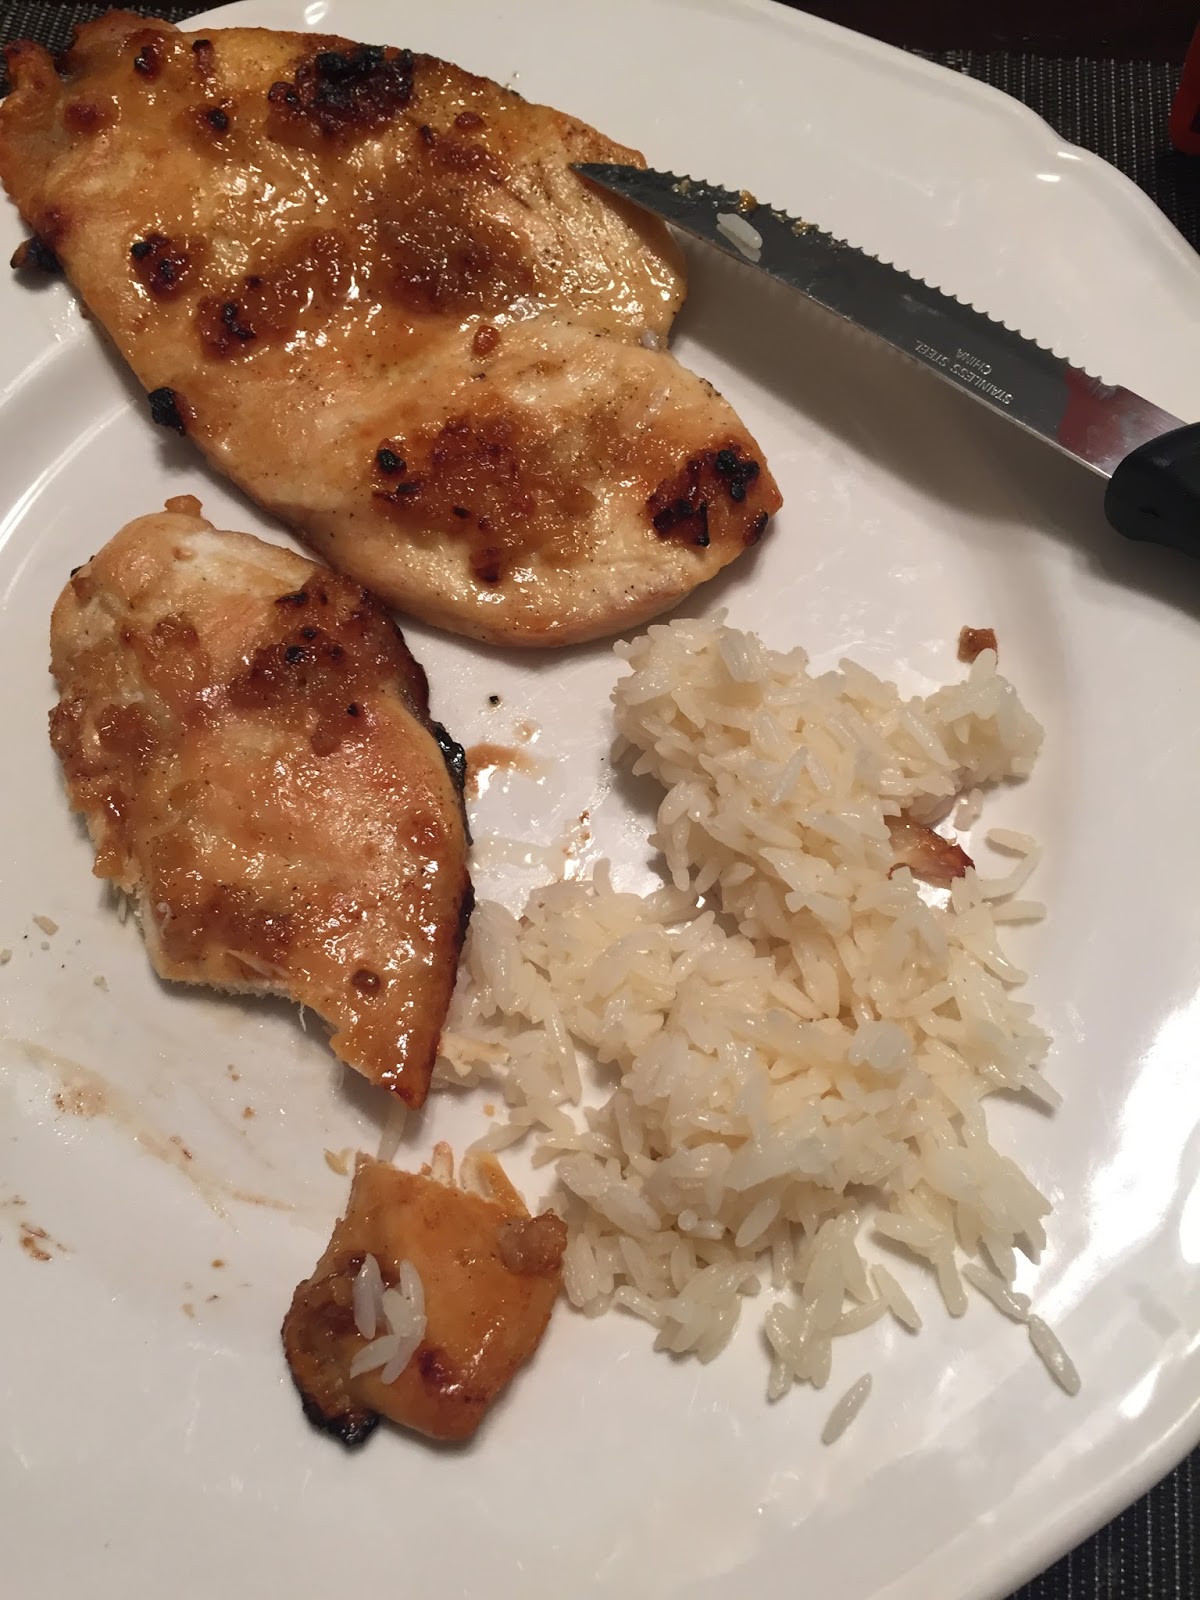
My mom wanted something healthy, while I wanted something flavorful and easy. That is how Garlic and Brown Sugar chicken was born.

It sounds kind of gross but my goodness it was tasty. It had a sweet, but not overpowering taste -- similar to what a teriyaki sauce tastes like.

And like I said, it was ridiculously easy.

Ingredients:

  • Chicken of your choice (I used thin sliced chicken breast cutlets) 
  • 4 TBSP of Brown Sugar
  • 2.5 TBSP of chopped garlic (I didn't have cloves but the original recipe calls for 4 cloves) 
  • 3 TSPs of Olive Oil


To Do:
  • Preheat oven to 400 degrees 
  • Grease a baking pan (I used cooking spray -- nothing better!)
  • Pour the 3 tsps of olive oil in a heated sauce pan
  • Saute the garlic in the olive oil until it becomes soft 
  • Place chicken in greased baking dish and season with salt & pepper
  • Take the pan off the heat and combine brown sugar with garlic
  • Take a spoon or fork and spread the garlic & sugar mixture on both sides of the chicken
  • Bake for 40 minutes (I cooked them until the chicken cutlets were brown, crispy, and almost burnt)
Uhh, these were DELICIOUS and I will 100% be making this constantly this winter. How easy was that? I mean, only a few steps and ingredients you should have in your house. 

What is your go-to fall dinner dish?


Since starting work full time back in April, my lounge days are limited to the weekends. That means, my Pinterest time is few and far inbetween.

I hadn't made a food concoction in quite a while, but a month ago, during the 4th of July weekend I basically had a 4 day weekend and a little bit of time on my hands.

With this, I started looking through Pinterest and decided that a breakfast casserole was my next project. This is very similar to the breakfast cups I made back in January, but just in a regular casserole form.

I couldn't find a recipe that exactly fit what I want-- a lot used ham instead of bacon, were for serving sizes of 24 people, or just wasn't what I was looking for. I decided to just wing it and make something of my own.

Ingredients:


1 package of Pillsbury Crescent Rolls
Half a package of Hash Browns
8 Eggs
Bacon (as much as you'd like) -- precook before hand
Shredded Cheese (whichever kind, however much you'd like)

Steps:

1. Spray casserole pan with cooking spray
2. Spread package of crescent rolls over the casserole pan, make sure there are no open spaces between the dough, seal up any cracks.
3. Spread raw hash browns on top of the crescent rolls
4. Beat 8 eggs together in a bowl (add salt and pepper if you'd like) and pour over hashbrowns
5. Add pre cooked bacon slices on top (I broke the pieces of bacon in half to cover more space)
6. Sprinkle with shredded cheese
7. Cook at 350 degrees for about 15-25 minutes, or until the edges of the crescent rolls look golden brown, and the eggs are cooked thoroughly.


This casserole lasted for weeks. It was honestly way too much (whoops) so after about 5 days in the refrigerator, I cut it in half and put it in the freezer. It tasted just as good after it was defrosted and heated in the microwave.

This is such a fun brunch idea, if you're having a weekend brunch for your girlfriends -- it's something easy and quick to make that is different!


Another recipe Wednesday because I have an addiction to Pinterest recipes...especially breakfast ones.

I've seen a lot of variations of this particular recipe but the one I followed was easiest and virtually took no time.

I made this last Tuesday because I needed to kill some time and on Sunday because I was in the mood for a big breakfast.

Honestly, these are really similar to the breakfast cups I make (I use the same exact ingredients) but just in a different form.

This is the original recipe but I changed it up very slightly.


Ingredients:
1 can of crescent rolls
4 eggs
4 slices of bacon
Shredded cheddar cheese
Salt & pepper

Steps:
1. Preheat oven to 350 degrees
2. Lay out crescent rolls on aluminum foil covered cookie sheet; grease aluminum foil with cooking spray
3. Divide the crescent rolls into to separate pieces


4. Seal up the openings of the crescent rolls and roll up the sides about an inch in, creating little walls
5. Crack two eggs on each crescent roll; place bacon strips on top, sprinkle as much cheese as you'd like, and add salt and peppers to taste


6. Place in preheated oven and cook for 20 minutes or until crescent rolls are browned


And then enjoy!

It's not the healthiest breakfast but it's delicious and a special treat.

What's your favorite Pinterest breakfast recipe? 


One fun fact about me is that I hate eating vegetables. Yes, I'm a five year old. But really... I hate vegetables. I don't eat salads, I never get vegetable as a side and I stay as far away from things like Kale, as possible.

Is this bad? Of course it is but I can't help it.

The vegetables I do like are cauliflower, eggplant, and zucchini... but cooked to perfection, I can't "taste" the vegetable.

I'd have to say cauliflower is my favorite and the great thing about that is that there are overwhelming numbers of recipes on Pinterest that incorporate cauliflower in many ways. Substituting cauliflower for carbs? Sign me up!

I've been meaning to make something with cauliflower for months and I finally took the plunge. Cauliflower breadsticks were first on the list and they were easier than I expected, and tasted even better!

This is the original recipe I used and I changed it up a bit.

I used on bag of frozen cauliflower so I defrosted and steamed it in a pot of boiling water, and then I "riced" it in a food processor (I use the Magic Bullet). I also used a combination of cheeses and used slightly less than the recipe calls for, because I didn't have enough. #whoops

Other than that, I followed it pretty closely.


What you need:

1 head of fresh cauliflower
1/4 cup of egg whites or 1 large egg
1/2 + 3/4 cup of shredded cheese
Any type of herb seasoning
Salt and pepper to taste

Directions:

1. Cook cauliflower any way you like, whether it's teaming or roasting.
2. Drain the moisture out of the cauliflower by squeezing the florets in a towel
3. Rice the cauliflower in the food processor. (I couldn't get it completely down to a rice texture so I still had some chunks in it, which was fine!)
4. Combine riced cauliflower, egg, cheese, and seasoning (I used parsley and oregano) in a bowl till a dough like texture forms. (Mine wasn't completely doughy, it broke a little but it worked)
5. Roll out the dough on aluminum foiled pan (I used foil, the recipe says to use parchment paper) 
6. Bake in 375 Degree oven for 15-18 minutes, once golden brown, sprinkle rest of cheese on top of breadsticks and cook for another 5 minutes or until cheese is melted.
7. Let breadsticks cool, cut into slices and enjoy!


(I thought I had more photos but apparently not... sorry!)

It was a little complicated at first but once the cauliflower was riced, it was a really simple recipe. I think it would've been a lot easier if I didn't have to thaw out the frozen cauliflower and just used fresh (even if you use fresh cauliflower, you should still cook it first!)

These were so delicious and a really big hit with my family. I'm definitely going to attempt more cauilfower recipes soon!

What recipe have you attempted lately? 


Is this a new series? I have no idea but let's roll with it and see.

Since I've been home from school, especially since the weather has gotten colder, I've felt the need to cook more. Sometimes when I'm home, bored of Netflix and my computer, I'll log onto Pinterest and see what I could make.

Honestly, I've made some pretty good things off Pinterest lately and I'm super proud of myself! Pinterest makes everything look so easy so when you finally do make something successfully, it's a big deal...right?

These breakfast cups that I'm about to tell you about is by far my favorite recipe because it's the easiest. It's basically full proof, you cannot mess it up.

I love breakfast. Breakfast is my favorite meal of the day...words cannot explain it. I will pick breakfast over anything and I love finding new ways to make it. 

Over the past few months I've seen so many variations of these "breakfast muffins" and I even attempted one last year but I like these so much better. 

Bacon, eggs, cheese, and crescents all in one neat little package...seriously what more could you want?

This is the original recipe I found but I changed mine up a little bit. This recipe makes 12 muffins, perfect for on the go breakfast or just something different from your standard bacon and eggs.

This recipe isn't an exact science. You really can do whatever you want. If you don't want bacon, use something else, just more or less cheese—seriously, whatever you want! I won't tell anyone.


What you need:

6 eggs
8-12 strips of bacon (depending on what you want)
Shredded cheddar cheese
1 package of crescent roll dough

Directions:

Spray muffin tin with cooking spray, thoroughly

Preheat oven to 350 degrees


Scramble 6 eggs with a little bit of milk

Cook the bacon to your liking, whether it's in the microwave or oven

Roll out the crescent roll dough onto a cutting board, making sure there are no spaces between the dough. Make the dough one complete sheet, not separate pieces


Place the dough pieces on the bottom of the muffin pan, bringing them up on the sides as much as possible but making sure there are no tears. If there is and you have left over dough after covering each pan, you can add the extras on the bottom.

Place bacon strips on top of crescent dough (I usually cut one strip in half and place the two pieces in the pan) 


Pour egg mixture (as much as you want) into each pan


Sprinkle cheese (as much as you want) onto the top

Place in oven, bake for 15-20 minutes, until cheese melts and you can clearly see the egg has cooked. 

Viola, you are finished!

I took one out of the pan before I could take a pic #bloggerfail
Like I said, you can substitute items or add more or less of each ingredient. It all depends on your mood and taste... you really can't mess this up, promise!

I've made these a few times and each time they come out better and better. They are truly the perfect breakfast! 

What has been your most successful Pinterest recipe? Tell me in the comments!


COPYRIGHT © Royally Pink · THEME BY WATDESIGNEXPRESS